Blog

  • Custom Logo Digitizing for Apparel Brands: The Complete Guide

    For apparel brands, the embroidered logo is often the single most important brand touchpoint. It appears on every product, represents the brand to every customer, and directly reflects brand quality. Getting your logo digitizing right is not optional — it is essential.

    Preparing Your Logo for Digitizing

    Resolution and Format The best input for digitizing is a clean vector file (AI, EPS, or SVG). If you only have a raster logo, provide the highest-resolution version available. The digitizer may recommend a vector conversion before digitizing complex logos.

    Color Information Provide your brand’s Pantone colors, CMYK values, or hex codes. Your digitizer will match these to the closest available embroidery thread colors from Madeira, Robison-Anton, or Isacord thread charts.

    Size Requirements Specify all the placement sizes you need. Common apparel placements include:

    • Left chest: 3.5″ x 3.5″ (standard shirts and polos)
    • Full front: up to 12″ x 12″
    • Sleeve: 2.5″ x 2.5″ to 4″ x 4″
    • Hat front: 2.5″ x 3.5″
    • Back: up to 12″ x 14″

    Different sizes require different digitized files — a design optimized for a 12″ back panel cannot simply be scaled down to 3.5″ for the left chest and expect good results.

    Understanding Stitch Types

    Your digitizer will choose from several stitch types for different design elements:

    Satin Stitches: Used for borders, lettering, and narrow shapes. Creates a smooth, shiny surface. Best for widths between 1mm and 8mm.

    Fill Stitches: Used for large filled areas. Creates a textured surface with rows of parallel stitches. Appropriate for areas wider than 8mm.

    Running Stitches: Fine single-line stitches used for outlines, fine details, and decorative elements.

    Quality Standards for Apparel Brands

    Premium apparel brands should look for:

    Color Accuracy: Thread colors that closely match brand standards across all production runs.

    Edge Definition: Clean, crisp edges without loose threads or irregular borders.

    Small Text Readability: Logos with taglines or small text should remain legible at the specified size.

    Fabric Compatibility: Files optimized for the specific fabrics in your line (lightweight polos, heavyweight fleece, denim, etc.).

    Consistency: The same design should produce identical results on every production run.

    Working with an Embroidery Digitizing Partner

    The best digitizing partnerships are collaborative. A quality digitizing service will:

    • Review your design and flag potential issues before digitizing
    • Suggest modifications that improve embroidery quality without compromising the design
    • Provide test files and welcome feedback before finalizing
    • Maintain your files in their system for easy reorders
    • Communicate proactively if they see potential quality issues

    Dream Embroidery Design works closely with apparel brands globally to deliver logo digitizing that represents their brand perfectly. Contact us to discuss your specific requirements.
  • Why Embroidery Digitizing Is Essential for Canadian Businesses in 2026

    Why Embroidery Digitizing Is Essential for Canadian Businesses in 2026

    Planning to print your logo on uniforms, caps, or promotional merchandise?

    If yes, then you need more than just a good design. You need professional embroidery digitizing.

    Many businesses across Canada assume they can directly use their logo for embroidery. But without proper digitizing, even the best designs can turn out uneven, distorted, or low quality.

    Whether you run a local business in Vancouver or manage a growing brand in Toronto, embroidery digitizing is the key to achieving clean, professional results.

    What Is Embroidery Digitizing?

    Embroidery digitizing is the process of converting your logo or artwork into a digital stitch file that embroidery machines can read.

    It is not just a file conversion. It is a technical process where a digitizer manually maps:

    • Stitch types

    • Stitch directions

    • Thread density

    • Fabric behavior

    This ensures your design is stitched accurately on fabric without distortion.

    Why Embroidery Digitizing Matters for Canadian Businesses

    1. Ensures High-Quality Embroidery Output

    Without proper digitizing, your design may look:

    • Uneven

    • Puckered

    • Misaligned

    A professionally digitized file ensures smooth, clean, and sharp embroidery every time.

    2. Essential for Uniforms and Workwear

    Businesses across Canada rely heavily on branded uniforms.

    Digitizing helps maintain:

    • Consistent logo placement

    • Accurate colours

    • Clean stitching across bulk orders

    3. Works Across Different Fabrics

    From heavy jackets to soft t-shirts and caps, each fabric behaves differently.

    Professional digitizing adjusts stitch patterns based on fabric type, ensuring:

    • No gaps in stitching

    • No fabric pulling

    • Long-lasting embroidery

    4. Saves Time and Production Costs

    Incorrect digitizing can lead to:

    • Thread breaks

    • Machine errors

    • Rework and delays

    A high-quality digitized file reduces production issues and speeds up delivery.

    Common Applications of Embroidery Digitizing in Canada

    Embroidery digitizing is widely used for:

    • Corporate uniforms

    • Sports team apparel

    • Promotional merchandise

    • Caps and winter toques

    • Workwear and safety gear

    For Canadian businesses, embroidery is a popular choice due to its durability and premium look.

    Common Questions About Embroidery Digitizing

    What file formats are used in embroidery digitizing?

    Common machine formats include:

    • DST

    • PES

    • EXP

    • JEF

    Your embroidery machine or vendor will specify the required format.

    Can any logo be digitized?

    Yes. Simple or complex logos can be digitized, but highly detailed designs may need slight adjustments for best results.

    Is digitizing the same as vector conversion?

    No. Vector conversion prepares artwork for scaling, while digitizing prepares it specifically for embroidery machines.

    Professional Embroidery Digitizing Services for Canada

    Getting your logo digitized correctly is critical for your brand image.

    At Dream Embroidery, we provide:

    • Custom embroidery digitizing

    • Logo digitizing for uniforms and caps

    • Fast turnaround (12–24 hours)

    • Machine-ready files for all formats

    We work with businesses worldwide, including clients across Canada, and understand the exact requirements of embroidery production.

    Get Your Logo Digitized Today

    Do not risk poor-quality embroidery.

    Get precise, machine-ready digitized files that deliver perfect results on every fabric.

    • Fast delivery within 12–24 hours

    • High-quality stitch mapping

    • Compatible with all embroidery machines

    Request your embroidery digitizing service today and get production-ready files without delays.

    Frequently Asked Questions (FAQs)

    1. What is embroidery digitizing and why is it important?

    Embroidery digitizing converts your logo into a stitch file that embroidery machines can read. It ensures accurate and high-quality stitching.

    2. How much does embroidery digitizing cost in Canada?

    Costs vary based on design complexity, size, and stitch count. Simple logos cost less, while detailed designs require more work.

    3. How long does digitizing take?

    Most designs are completed within 12–24 hours. Complex artwork may take longer.

    4. Do I need digitizing for every logo?

    Yes. Every design must be digitized before it can be embroidered.

    H3: 5. Can you edit digitized files later?

    Yes, but edits require re-digitizing adjustments to maintain stitch quality.

    6. What is the best file format for embroidery machines?

    DST is the most widely used format, but it depends on your machine type.

    7. Does digitizing affect embroidery quality?

    Yes. Good digitizing results in clean, professional embroidery, while poor digitizing leads to errors and low-quality output.

    8. Is embroidery better than printing for branding?

    Embroidery is more durable and gives a premium look, especially for uniforms and workwear.

    9. Can small businesses benefit from embroidery digitizing?

    Absolutely. It helps create a strong, professional brand image even for small local businesses.

    10. Why choose Dream Embroidery for digitizing services?

    Dream Embroidery offers fast turnaround, high precision, and reliable results suitable for Canadian businesses and global clients.

  • Why Your Canadian Business Needs Professional Vector Art Services in 2026

    Why Your Canadian Business Needs Professional Vector Art Services in 2026

    Are you trying to print your company logo on jackets, uniforms, or promotional merchandise, only to see it come out blurry or pixelated?

    This is a common issue for businesses across Canada. Whether you run a café in Vancouver or a growing brand in Toronto, poor-quality artwork can ruin your final product. The solution is simple: professional vector art conversion.

    If you plan to work with print shops or embroidery services in Canada, having clean, scalable vector files is no longer optional. It is essential.

    What Are Vector Graphics and Why Do They Matter?

    Most images like JPG or PNG files are raster-based. They are made up of pixels, which means they lose quality when resized.

    Vector graphics are different. They are created using mathematical paths, allowing them to scale to any size without losing clarity.

    Where Vector Graphics Are Used

    This means your logo will look sharp whether it is printed on:

    • Business cards

    • Embroidered uniforms

    • Large banners

    • Promotional merchandise

    For Canadian businesses working with professional printers, formats like SVG, EPS, and AI are industry standards.

    Why Vector Art Is Essential for Canadian Businesses in 2026

    1. Print-Ready Files for Canadian Print Shops

    Most print and embroidery shops in Canada require vector files. Without them, your order may be delayed or rejected.

    Having vector artwork ensures:

    • Smooth production process

    • No quality loss

    • Faster turnaround

    2. Perfect for Embroidery Digitizing

    If you are creating embroidered products like jackets, caps, or winter toques, vector files are the best starting point.

    They help digitizers:

    • Define clean edges

    • Map thread paths accurately

    • Deliver high-quality embroidery results

    3. Easy Edits and Future Scalability

    As your business grows, your branding may evolve.

    With vector files, you can:

    • Update colours instantly

    • Resize designs without quality loss

    • Adapt your logo for new marketing materials

    4. Build a Professional Brand Image

    First impressions matter. A blurry or stretched logo can damage trust.

    Clean vector graphics show that your business is:

    • Professional

    • Detail-oriented

    • Ready for serious growth

    Common Questions About Vector Art

    What file formats do Canadian printers prefer?

    The most commonly accepted formats are:

    • EPS

    • SVG

    • AI

    • PDF (vector-based)

    Can you convert any image into vector format?

    Yes. Low-resolution images, sketches, or old logos can be redrawn into high-quality vector files.

    Do I need vector files for embroidery?

    Absolutely. Vector artwork ensures accuracy and better results during the embroidery digitizing process.

    Professional Vector Art Services for Canada

    Getting your artwork converted should not slow down your business.

    At Dream Embroidery, we specialize in:

    • Logo vector conversion

    • Raster to vector services

    • Print-ready file preparation

    • Embroidery-ready artwork

    We work with businesses globally, including clients across Canada, and understand the exact requirements of Canadian print shops.

    Get Your Logo Converted Today

    Do not let low-quality images affect your brand.

    Get clean, scalable, and print-ready vector files that work perfectly for printing, embroidery, and branding.

    • Fast turnaround: 12–24 hours

    • 100% print-ready files guaranteed

    • Compatible with Canadian print and embroidery standards

    Request your vector conversion today and get your files ready without delays.

    Frequently Asked Questions (FAQs)

    1. What are vector art services and why are they important in Canada?

    Vector art services convert low-quality images (like JPG or PNG) into scalable formats such as SVG, EPS, or AI. In Canada, most print shops and embroidery businesses require vector files to ensure sharp, high-quality results.

    2. Do Canadian print shops require vector files?

    Yes. Most professional print shops across Canada prefer or require vector files because they can be resized without losing quality.

    3. How much do vector art services cost in Canada?

    Pricing depends on design complexity. Simple logos cost less, while detailed artwork requires more work. Many businesses choose cost-effective professional services for high-quality results.

    4. How long does vector conversion take?

    Most vector conversions are completed within 12–24 hours. Complex designs may take slightly longer.

    5. Can you convert a low-resolution logo into a vector file?

    Yes. Even blurry or pixelated images can be manually redrawn into clean, scalable vector artwork.

    6. Which vector format is best for printing?

    EPS, SVG, and AI are the most commonly used formats for professional printing and design work.

    7. Do I need vector files for embroidery digitizing?

    Yes. Vector files provide clean outlines, making it easier to create accurate stitch patterns.

    8. Can vector files be edited later?

    Yes. You can easily change colours, sizes, and design elements without losing quality.

    9. Is vector art useful for small businesses in Canada?

    Absolutely. It helps maintain a professional and consistent brand image across all platforms and products.

    10. Why choose Dream Embroidery for vector art services?

    Dream Embroidery offers fast turnaround, high accuracy, and print-ready files suitable for Canadian businesses and global clients.

  • Embroidery Digitizing Services in London: Everything You Need to Know

    London is home to some of the world’s most iconic brands, prestigious institutions, and vibrant sports clubs — all of which rely on embroidery to represent their identity on apparel and merchandise. From Savile Row tailors adding embroidered details to bespoke garments to Premier League clubs producing fan merchandise, embroidery digitizing is a critical service for London’s business community.

    The London Market for Embroidery Digitizing

    London businesses across every sector use embroidery for branding:

    Corporate: Banks, law firms, and professional services firms produce embroidered shirts, jackets, and gifts bearing their logos.

    Hospitality: London’s world-class hotels and restaurants embroider staff uniforms with property logos and branding.

    Sports: Football clubs, cricket clubs, and golf clubs produce merchandise, team kits, and member apparel.

    Fashion: Independent designers and established fashion houses incorporate embroidery into garment designs.

    Education: Universities and schools produce embroidered uniforms, sports kits, and branded merchandise.

    Finding Quality Digitizing for London Projects

    When sourcing embroidery digitizing for London projects, consider:

    Turnaround Time: Many London projects have tight deadlines. Choose a service offering 24-hour turnaround with rush options.

    Quality Standards: London clients expect premium quality. Look for services that use manual digitizing rather than automated tools.

    International Services: Many of the best embroidery digitizing services operate internationally, offering UK clients competitive pricing and fast digital file delivery.

    File Format Support: UK embroiderers use the same international formats (DST, PES, JEF, VP3) as the rest of the world. Ensure your digitizing service supports the format for your specific machines.

    Working with International Digitizing Services

    International embroidery digitizing services like Dream Embroidery Design offer London businesses several advantages:

    • Cost efficiency: International pricing (starting from £8–£15 per design) is often more competitive than local UK digitizing services
    • Fast digital delivery: Files delivered by email within 24 hours, regardless of time zones
    • Experience: Specialists in international brand standards and professional quality

    Get professional embroidery digitizing for your London business at dreamembroiderydesign.com.

  • Why Professional Digitizing Always Beats Auto-Digitizing Software

    The rise of auto-digitizing software has made it tempting for businesses to skip professional digitizing services. Drag and drop a logo, click a button, get a DST file — sounds perfect, right? In practice, auto-digitized files consistently produce inferior embroidery results, and here is why.

    What Auto-Digitizing Software Does (and Does Not Do)

    Auto-digitizing software converts artwork to embroidery files using algorithms that analyze the image and assign stitch patterns. These algorithms are improving but still fall far short of human judgment in several critical areas.

    The software cannot interpret design intent. It does not know that a thin outline should be a single satin border, or that a large filled shape should have specific stitch direction to enhance visual impact. It makes generic decisions that often look mediocre.

    It cannot handle complexity intelligently. Complex multi-element logos, overlapping shapes, and fine details are frequently mishandled by auto-digitizing, resulting in ugly merged stitches or missed details.

    It does not optimize for fabric type. A professional digitizer adjusts stitch density, underlay, and pull compensation based on whether the design will be sewn on lightweight jersey, heavy denim, or structured cap material. Auto-software applies the same generic settings.

    What a Professional Digitizer Does

    A skilled embroidery digitizer makes hundreds of deliberate decisions for every design:

    Stitch Type Selection: Choosing between satin stitches, fill stitches, running stitches, and specialty stitches for each design element.

    Stitch Direction: Setting stitch angles to enhance curves, add dimension, and create visual separation between elements.

    Density Adjustment: Calibrating stitch density based on fabric type, design size, and thread weight.

    Underlay Planning: Adding underlay stitches that stabilize fabric, smooth uneven surfaces, and provide a foundation for top stitches.

    Sequence Optimization: Planning the order of sewing to minimize trims, reduce production time, and prevent color registration problems.

    Pull Compensation: Accounting for fabric pull during sewing to ensure shapes are properly sized after stitching.

    The Real Cost of Auto-Digitizing

    Using auto-digitized files might save a few dollars per design, but the downstream costs can be significant:

    • Thread breaks slow production and damage expensive garments
    • Poor results require resewing, wasting time and materials
    • Brand damage from unprofessional-looking embroidery on merchandise
    • Rework costs that far exceed the savings from cheap digitizing

    Invest in Quality Digitizing

    Professional embroidery digitizing from Dream Embroidery Design costs as little as $10 per design — a small investment that guarantees clean, professional results every time. Our experienced digitizers handle every design manually with full attention to detail and brand accuracy.

  • Embroidery Digitizing Services in Sydney, Australia

    Sydney is Australia’s largest city and business hub, home to some of the country’s most recognized brands and businesses. From the hospitality industry along Circular Quay and Darling Harbour to the corporate towers of the CBD and the sports clubs of the western suburbs, Sydney has diverse and sophisticated embroidery needs.

    Sydney’s Embroidery Digitizing Needs

    Corporate Sector: Sydney’s financial institutions, law firms, and professional services companies produce branded corporate wear for thousands of employees. Quality and consistency are paramount.

    Hospitality and Tourism: Sydney’s world-class hotels, restaurants, and tourist attractions embroider staff uniforms, creating a professional, branded presentation for international visitors.

    Sports Clubs: Sydney’s NRL teams, AFL clubs, cricket teams, and local sporting clubs all require quality embroidery for team kits, fan merchandise, and club apparel.

    Mining and Resources: Companies with operations in New South Wales require durable embroidered workwear and safety apparel.

    Education: Sydney’s universities and private schools produce embroidered uniforms, sports kits, and branded merchandise for their communities.

    Sourcing Embroidery Digitizing for Sydney Projects

    Sydney embroiderers have several options for sourcing digitizing files:

    Local Digitizing Services: Higher cost, but potential advantage for in-person consultation.

    International Digitizing Services: Often more cost-effective with equally high quality and fast digital file delivery. Services like Dream Embroidery Design deliver files within 24 hours regardless of location.

    Key Considerations:

    • Ensure the service supports your machine format (most Australian embroiderers use DST, PES, or JEF)
    • Look for manual digitizing, not auto-digitizing
    • Verify revision policy before ordering
    • Check pricing includes all formats needed

    Dream Embroidery Design: Your Sydney Digitizing Partner

    Dream Embroidery Design serves Sydney businesses and embroiderers with professional embroidery digitizing files delivered within 24 hours. Our pricing starts from AUD$15 per design, with unlimited revisions and support for all major machine formats.

    Contact us at dreamembroiderydesign.com to get started on your Sydney embroidery project.

  • Embroidery Digital Mockups in Canada: Preview Your Design Before Production (2026 Guide)

    Embroidery Digital Mockups in Canada: Preview Your Design Before Production (2026 Guide)

    If you’re creating custom apparel for your brand in Canada, one mistake can cost you time, money, and customer trust.

    The biggest challenge in embroidery is simple:
    What you see on screen doesn’t always match the final stitched result.

    That’s where embroidery digital mockups become essential.

    Whether you’re a clothing brand in Toronto, a startup in Vancouver, or a business ordering uniforms across Canada, digital mockups help you see exactly how your design will look before production begins.

    What is an Embroidery Digital Mockup?

    A digital mockup is a realistic preview of your design applied to a garment before it is embroidered.

    But it’s not just placing a logo on a t-shirt image.

    A professional mockup shows:

    • Stitch texture and thread direction
    • Accurate logo size and proportions
    • Exact placement (left chest, cap front, sleeve, etc.)
    • Realistic thread shine and depth

    This helps you visualize the final product with high accuracy.

    Why Digital Mockups Are Essential for Canadian Businesses

    In Canada’s competitive apparel market, quality matters. Whether you’re selling streetwear or ordering corporate uniforms, you can’t afford mistakes.

    Digital mockups help you:

    Avoid Costly Errors

    See issues before production starts

    Speed Up Approvals

    Make quick changes without delays

    Save Sampling Costs

    No need to ship physical samples

    Ensure Brand Consistency

    Perfect logo placement and colour accuracy every time

    Key Benefits of Embroidery Mockups (2026)

    1. Accurate Colour Matching

    We use professional thread charts like Madeira and Isacord to match your brand colours closely.

    This ensures your logo looks consistent across all garments in Canada.

    1. Faster Production Turnaround

    Mockups can be created and approved within hours.

    Need to resize or reposition your logo? It can be updated instantly without restarting the process.

    1. Cost-Effective Design Testing

    Want to test different styles?

    • Gold thread on black hoodie
    • White thread on navy t-shirt

    You can preview multiple variations without spending on physical samples.

    Our Process: From Design to Final Embroidery

    At Dream Embroidery, we follow a structured workflow to ensure accuracy:

    1. Artwork Preparation – Checking your file quality
    2. Embroidery Digitizing – Converting design into stitch format
    3. Mockup Creation – Applying design to garment preview
    4. Lighting & Texture Simulation – Adding realistic embroidery effect
    5. Client Approval – Final review before production
    6. Production – Stitching begins after approval

    Real Example (Canada-Based Client)

    We recently worked with a Vancouver-based clothing brand that needed logo embroidery on hoodies and caps.

    Using digital mockups, we helped them:

    • Adjust logo size for better visibility
    • Fix placement alignment
    • Test multiple colour combinations

    The result was a clean, premium finish across all products without any rework.

    Why Choose Dream Embroidery for Digital Mockups?

    We work with clients across Canada and offer:

    • Fast turnaround time
    • High-accuracy mockups
    • Bulk order support
    • Experience with international brands

    Our goal is simple:
    What you see in the mockup is what you get in the final product.

     Related Services

    • Vector Art Services:
    • Embroidery Digitizing: 

    FAQs (Optimized for Search)

    What file format is best for embroidery mockups?

    Vector files (AI, EPS, PDF) provide the best results. High-resolution PNG or JPEG can also work.

    How accurate are mockup colours?

    We use real thread charts for reference. Slight variation may occur due to screen settings, but production matches industry standards.

    Can I change logo placement after mockup?

    Yes, you can adjust size, position, and colour before production starts.

    Do mockups show stitch count?

    No, but they represent stitch density visually. Final stitch count is set during digitizing.

    Can you create mockups for puff or metallic embroidery?

    Yes, we can simulate 3D puff and metallic thread effects in previews.

  • Colour Separation Services in Canada: The Complete 2026 Guide for Apparel Brands

    Colour Separation Services in Canada: The Complete 2026 Guide for Apparel Brands

    If you’re running a clothing brand or printing business in Canada, your final product quality depends heavily on one critical step — colour separation.

    Whether you’re based in Toronto, Vancouver, or any growing apparel hub, poor colour separation can ruin even the best designs. Blurry prints, dull colours, and misalignment can instantly damage your brand image.

    That’s why professional colour separation services are essential for modern screen printing in 2026.

    What is Colour Separation in Screen Printing?

    Colour separation is the process of breaking a full-colour design into individual layers, where each colour is printed separately using different screens.

    In screen printing, every colour requires its own setup. Without proper separation, your design will not print accurately on fabric.

    For Canadian apparel brands, this step ensures:

    • Sharp print quality
    • Accurate brand colours
    • Consistent bulk production

    Why Canadian Businesses Need Professional Colour Separation

    The Canadian apparel market is highly competitive. Customers expect premium-quality prints, whether it’s for streetwear, corporate uniforms, or promotional merchandise.

    Poor colour separation can lead to:

    • Misaligned prints (registration issues)
    • Faded or incorrect colours
    • Low-quality finish

    Professional services ensure your designs look clean, sharp, and retail-ready.

    4 Types of Colour Separation Used in 2026

    1. Spot Colour Separation

    Uses exact Pantone colours for solid prints.

    Best for:

    • Logos
    • Branding
    • Corporate apparel

    Result: Clean edges and consistent colours across all garments.

    1. CMYK Process Separation

    Uses Cyan, Magenta, Yellow, and Black to recreate detailed images.

    Best for:

    • Photographs
    • Complex designs
    • Light-coloured garments
    1. Simulated Process Separation

    Advanced technique for printing detailed designs on dark fabrics.

    Best for:

    • Streetwear brands
    • Dark hoodies and t-shirts

    Result: High detail with soft print feel.

    1. Index Colour Separation

    Uses pixel-based separation for unique textures.

    Best for:

    • Vintage designs
    • Distressed artwork

    Our Colour Separation Process

    At Dream Embroidery, we follow a precise workflow to ensure high-quality output:

    1. Artwork analysis and correction
    2. Professional colour separation using advanced software
    3. Film output for each colour layer
    4. Screen preparation and exposure
    5. Final print production

    Why Canadian Brands Choose Dream Embroidery

    We support apparel businesses across Canada with:

    • Fast turnaround times
    • Bulk order support
    • High-precision colour matching
    • Experience with international clients

    Whether you’re a startup or an established clothing brand, we ensure your designs print exactly as intended.

    Real Example

    We recently worked with a Toronto-based streetwear brand that needed detailed prints on black hoodies.

    Using simulated process separation, we achieved:

    • Sharp detailing
    • Vibrant colours on dark fabric
    • Consistent results across bulk orders

     Related Services

    • Vector Art Services
    • Embroidery Digitizing

    FAQs

    Does more colours increase cost?

    Yes. Each colour requires a separate screen. However, smart techniques like halftones can reduce costs.

    Can you match exact brand colours?

    Yes, we use Pantone matching to ensure colour accuracy.

    What is white underbase?

    A white layer printed first on dark garments to keep colours bright and visible.

    Which file format is best?

    Vector files (AI, EPS, SVG) provide the best results for colour separation.

  • The Insider’s Guide to Custom Patches: Quality, Styles, and 2026 Trends

    The Insider’s Guide to Custom Patches: Quality, Styles, and 2026 Trends

    If you have ever looked at a plain denim jacket or a corporate polo and felt it was missing “soul,” you’ve likely considered a custom patch. But here is the thing: not all patches are created equal. As we move through 2026, the industry has shifted away from cheap, mass-produced “stickers” toward high-texture, durable art pieces that actually tell a story.

    At Dream Embroidery, we see patches as more than just accessories—they are the bridge between your brand’s identity and the physical world. Whether you’re a local business owner in India looking to professionalize your team or a fashion enthusiast DIY-ing a new collection, this guide breaks down the “why” and “how” of modern patch making.

    Why Patches are Dominating Fashion in 2026

    We are seeing a massive trend toward individuality. People are tired of fast fashion that looks the same on everyone. Custom patches offer a sustainable way to upcycle old clothes, turning a standard thrift-store find into a high-end statement piece.

    Beyond fashion, businesses are realizing that patches offer better ROI than direct printing. You can buy 500 patches, keep them in a drawer, and apply them to hats, bags, or jackets only when you need them. It’s smart, scalable branding.

    Choosing Your Weapon: The Main Types of Patches

    Choosing the right style is the difference between a “cool” patch and one that looks like a budget mistake.

    1. The Classic: Embroidered Patches

    This is the gold standard. We use high-speed machines to stitch your design onto a backing. In 2026, 3D “Puff” Embroidery is a huge hit—it literally jumps off the fabric, giving your logo a heavy, premium feel.

    • Best for: Logos with 1–6 colors and bold lines.
    1. The Detailed: Woven Patches

    If your logo has tiny text or very fine lines, embroidery might look “chunky.” Woven patches use much thinner threads and a tighter weave. They are flat, smooth, and can capture incredible detail that a needle and thread simply can’t reach.

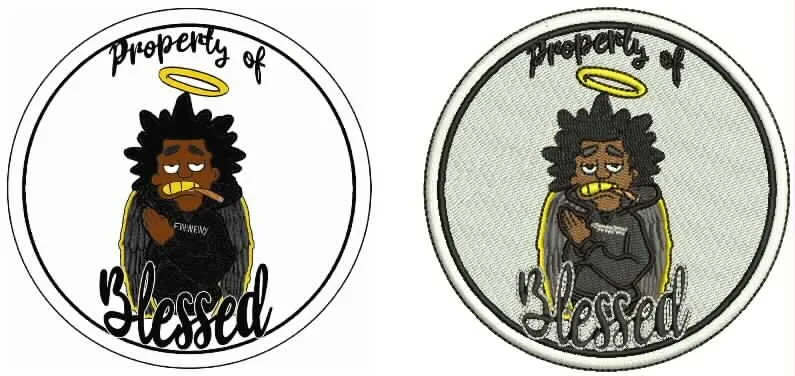
    • Best for: Intricate artwork or small “property of” labels.
    1. The Vintage: Chenille Patches

    You know that fuzzy, carpet-like feel on old school varsity jackets? That’s Chenille. It’s making a massive comeback in streetwear. It adds a soft, tactile dimension that people can’t help but touch.

    • Best for: Large letters, numbers, and simple shapes.
    1. The Rugged: PVC Patches

    For outdoor gear, tactical vests, or rain jackets, thread isn’t always the best choice. PVC (rubber) patches are waterproof, impossible to fray, and can be molded into 2D or 3D designs.

    • Best for: Adventure brands and heavy-duty workwear.

    The Secret Sauce: Which Backing is Right?

    Most people forget about the backing until the patch arrives. Don’t be that person.

    • Sew-On (No Backing): The most flexible and durable. If you want the patch to last 10 years and survive 100 washes, sew it on.
    • Iron-On (Heat Seal): Perfect for DIY. You just need a heat press or a household iron. Pro Tip: Don’t use iron-ons on synthetic fabrics like nylon; they’ll melt!
    • Velcro (Hook & Loop): Essential for uniforms. You can swap your “Manager” patch for a “Staff” patch in two seconds.
    • Adhesive (Sticky): Treat these like stickers. Great for a one-day event or a trade show, but they will fall off in the laundry.

    Frequently Asked Questions (The Real Stuff)

    Q: How do I know if my logo will look good as a patch? Usually, the simpler the better. If your logo has 20 different colors and tiny gradients, we might suggest a Printed Patch or a Woven style. Always aim for high contrast so your design “pops” from a distance.

    Q: Will the colors fade over time? Not if you use high-quality polyester threads. Polyester is bleach-resistant and holds its color even in the sun. At Dream Embroidery, we use threads designed to survive the Indian climate—from high heat to humidity.

    Q: Can I apply a patch to a hat myself? Hats are tricky because of the curve. While you can iron them on, we always recommend a professional hat press or a simple “running stitch” around the edges to make sure the corners don’t peel up.

    Q: What is “digitizing” and why do I have to pay for it? Think of digitizing as “translating.” We have to turn your JPG or PNG image into a map of thousands of individual stitches. It’s a manual process done by a specialist to ensure the machine doesn’t “birdnest” or ruin your garment.

    Q: How long does it actually take? Most custom orders take 10–14 days. This includes the design phase, the “sample stitch-out” (where we show you a photo of the first physical patch), and the final production run.

    If you’re ready to see your design in thread, reach out to us at Dream Embroidery. We don’t just “hit go” on a machine; we treat every stitch like a piece of art.

  • Beyond the Fabric: A Guide to T-Shirt Design and Professional Printing

    Beyond the Fabric: A Guide to T-Shirt Design and Professional Printing

    Let’s be honest: we have all owned a t-shirt that we loved the design of, but after two washes, the print started to crack, peel, or fade into a ghost of its former self. On the flip side, we’ve all seen corporate shirts that feel like wearing a stiff piece of plastic.

    At Dream Embroidery, we believe a t-shirt is a walking billboard for your brand, your event, or your personal style. But getting a “good” shirt isn’t just about hitting print. it is about the marriage of the right design, the right fabric, and the most suitable printing technology. Whether you are looking for high-end corporate polos or custom streetwear tees, here is what you need to know about the world of shirt printing in 2026.

    The Design First Approach: Why Most Shirts Fail

    Before a single drop of ink touches the fabric, the design has to be “print-ready.” A common mistake is taking a tiny, low-resolution photo from the internet and expecting it to look sharp on a chest-sized print.

    When designing for shirts, vector graphics are your best friend. They allow us to scale your logo to any size without losing a crisp edge. Furthermore, you have to consider the “negative space.” Sometimes, the color of the shirt itself can act as a color in your design, making the print feel lighter and more breathable.

    Choosing Your Method: Screen Printing vs. Digital vs. Embroidery

    Not every design works on every machine. Here is a quick breakdown of how we decide which path to take:

    1. Screen Printing (The Industry Standard)

    This is the classic method where ink is pushed through a mesh stencil. It’s incredibly durable and the colors are vibrant.

    • Best for: Large orders (20+ shirts) with 1–3 colors.
    • The Vibe: That thick, premium feel that lasts for years.
    1. DTF (Direct to Film) Printing

    This is the modern game-changer. The design is printed onto a special film and then heat-pressed onto the shirt. Unlike older “iron-ons,” DTF is stretchable and won’t crack easily.

    • Best for: Complex, multi-color designs, photos, or small batches.
    • The Vibe: Intricate detail that you can actually feel the texture of.
    1. Custom Embroidery

    If you want to look professional, embroidery is the way to go. Instead of ink, we use high-sheen polyester threads to stitch your logo directly into the fabric.

    • Best for: Left-chest logos on polos, jackets, and hats.
    • The Vibe: High-end, corporate, and virtually indestructible.

    2026 Trends: What is “In” Right Now?

    We are seeing a massive shift toward Minimalism. Big, loud, boxy prints are being replaced by small, thoughtful placements—think a tiny logo on the nape of the neck or a subtle vertical print along the side seam.

    Another huge trend is Heavyweight Cotton. People are moving away from thin, “see-through” t-shirts and opting for 220+ GSM fabrics that provide a structured, boxy fit. When you print on high-quality fabric, the print itself looks more expensive.

    Frequently Asked Questions (Informational FAQs)

    Q: How do I prevent my printed t-shirts from cracking? A: The secret is in the laundry room. Always wash your custom shirts inside out in cold water. Avoid the dryer if possible; high heat is the number one enemy of garment ink. If you must iron, never iron directly over the print—turn the shirt inside out first.

    Q: What is the best shirt material for printing? A: 100% Combed Cotton is the gold standard for both comfort and ink absorption. If you are doing athletic wear, a Polyester-Spandex blend is better, but it requires a specific type of “Sublimation” printing to ensure the design doesn’t wash away.

    Q: Can you print on dark-colored shirts? A: Absolutely. However, dark shirts usually require a “base layer” of white ink first so that the colors on top stay bright. This is why printing on black or navy shirts is sometimes slightly more expensive than printing on white.

    Q: What is the difference between a “Standard” print and a “Premium” print? A: It usually comes down to the ink and the curing process. Premium prints use eco-friendly, high-stretch inks that feel softer to the touch (often called “soft-hand” ink) rather than the thick, rubbery feel of cheaper alternatives.

    Q: How long does a typical printing project take? A: Once the design is finalized and “digitized,” most projects are completed within 7 to 10 working days. This allows time for sourcing the right shirt sizes, setting up the screens or films, and proper heat-curing to ensure the print stays permanent.

    If you’re ready to see your design in thread, reach out to us at Dream Embroidery. We don’t just “hit go” on a machine; we treat every stitch like a piece of art.